
This article explains how to configure Microsoft Entra ID (formerly Azure Active Directory) as a SCIM client for snapAddy. By following these steps, you can streamline user provisioning and management in one centralized location.
Prerequisites
- You have an SCIM API key configured in the User provisioning section of your organization.
- You have the permissions to configure user provisioning in Entra ID (one of: Application Administrator, Cloud Application Administrator, Global Administrator)
We recommend to use SCIM along with either SAML or OpenID-Connect Single-SignOn and to disable login via username and password in the Login & Security section of your organization. Make sure to also disable the snapAddy invitation email for your users under Invitation & Onboarding. This way users will not be asked to configure a password for their account.
Set up and Enterprise Application in Azure
If you have already configured an Enterprise Application for snapAddy or already use the snapAddy Single Sign On app in Azure you can skip this part and move on with Configure User Provisioning.
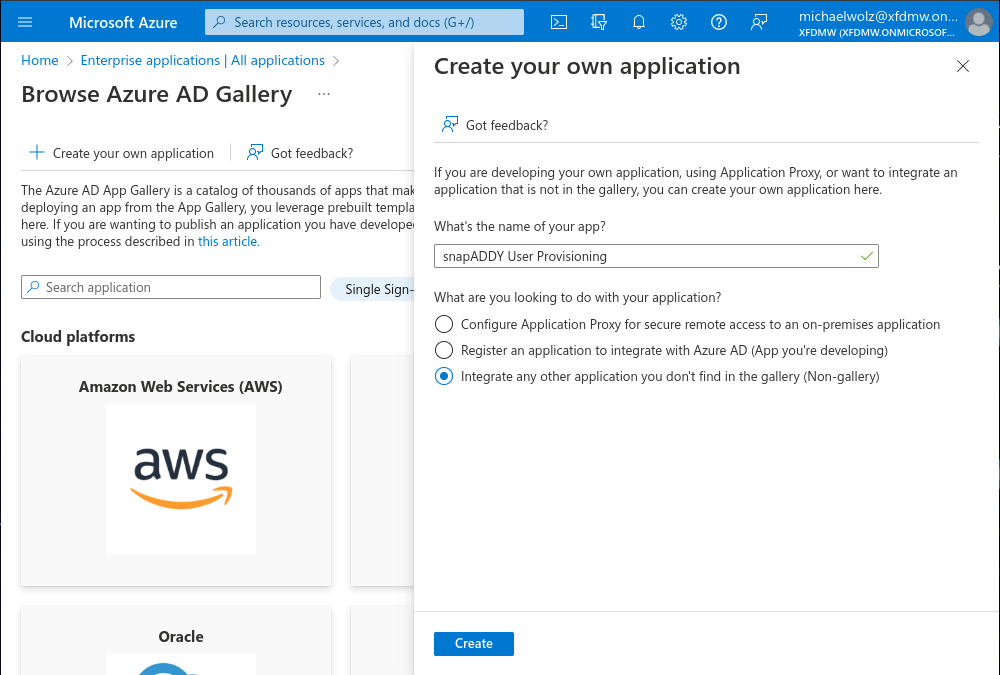
- Go to Enterprise Applications in Azure and choose New Application -> Create your own Application.
- On the right side of the screen choose: Integrate any other application you don't find in the gallery (Non-gallery).
- Provide a name for the application such as snapAddy User Provisioning or snapAddy Single SignOn if you intent to also configure SAML later on with the same application.
Configure User Provisioning
- Click on Provisioning in the left navigation bar of the Enterprise Application and then Get startet. Click on Connect your application.
- Use the following settings
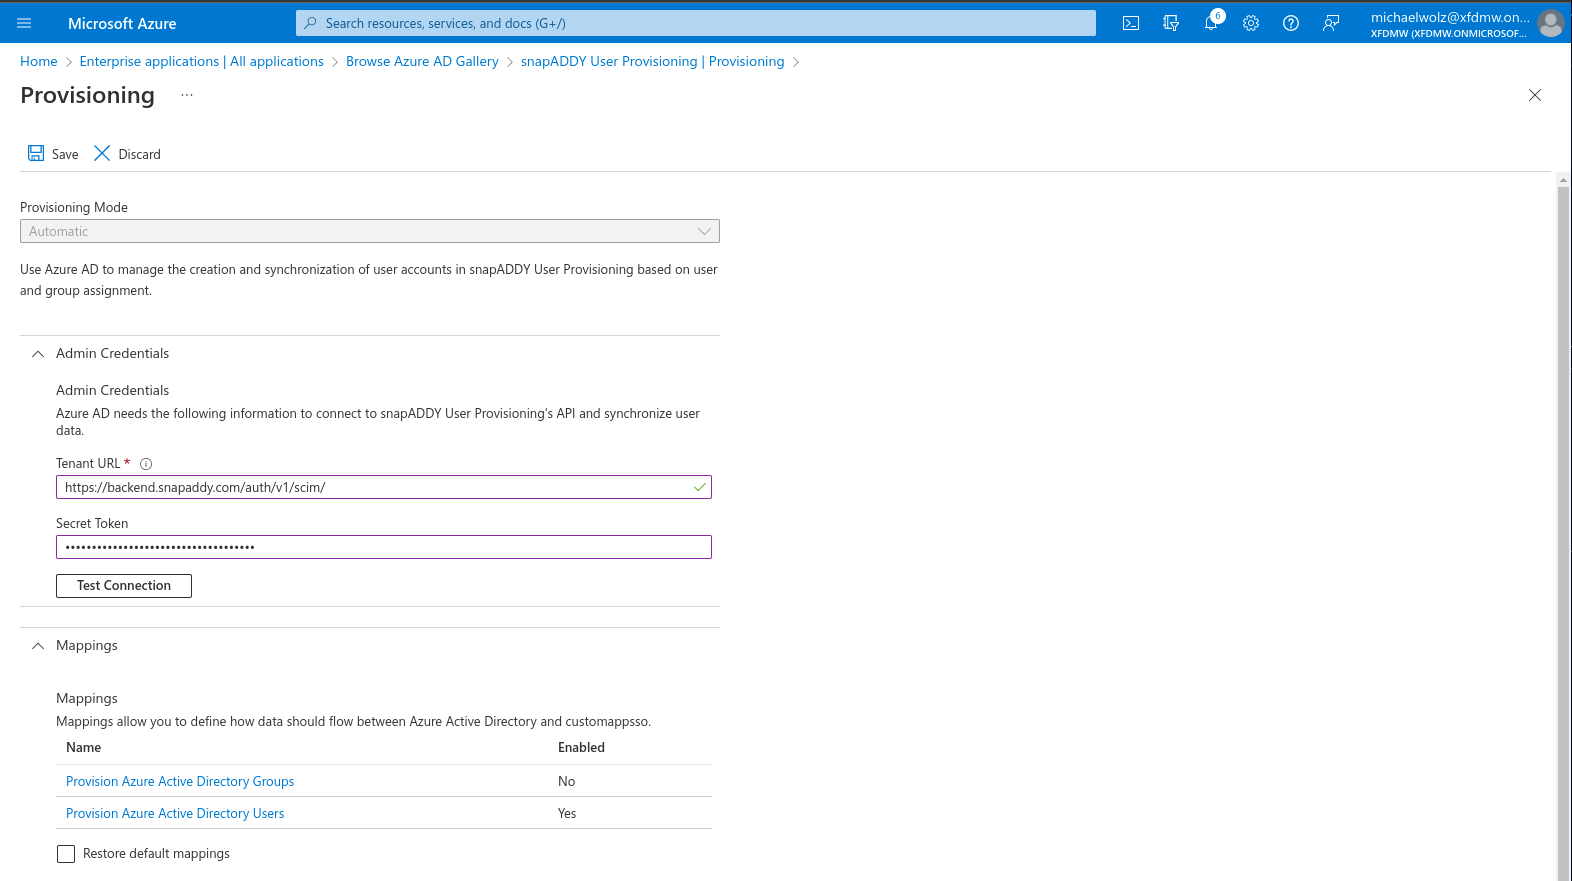
- Provisioning Mode: Automatic.
-
Tenant URL: https://backend.snapaddy.com/auth/v1/scim?aadOptscim062020
-
Secret Token: Your SCIM API key generated in the administration settings of your organization under User provisioning
- Click Test Connection and Save after a successful connection check.
- Next configure the Attribute Mapping for Provision Microsoft Entra ID Users.
Remove any other attributes and set the Matching precedence of the userName attribute to 1.customappsso Attribute Microsoft Entra ID Attribute userName email addresses[type eq "work"].locality city addresses[type eq "work"].country country emails[type eq "work"].value mail phoneNumbers[type eq "fax"].value facsimileTelephoneNumber name.givenName givenName active Switch([IsSoftDeleted], , "False", "True", "True", "False") name.familyName surname preferredLanguage preferredLanguage phoneNumbers[type eq "mobile"].value mobile urn:ietf:params:scim:schemas:extension:enterprise:2.0:User:organization companyName phoneNumbers[type eq "work"].value telephoneNumber title jobTitle addresses[type eq "work"].region state addresses[type eq "work"].streetAddress streetAddress addresses[type eq "work"].postalCode postalCode urn:ietf:params:scim:schemas:extension:snapaddy:2.0:User:academicTitle optional/custom
Configure Group Provisioning
The following steps are required only if you plan to provision licenses or business card templates via SCIM.
When provisioning licenses through SCIM, you must either use concurrent licenses or ensure that you have purchased enough licenses to allocate one per user. Failing to do so will require you to manually resolve licensing conflicts by ensuring the number of users configured in your identity provider does not exceed the available licenses.
- First go back to the User provisioning setttings of your organization in snapAddy.
- For all licenses to be assigned to users via SCIM, specify the corresponding Entra Object ID (unique identifier of the Entra group).

- Configure the Attribute Mapping for Provision Microsoft Entra ID Groups.
customappsso Attribute Microsoft Entra ID Attribute externalId objectId displayName displayName members members
Finish the set up
- Under Settings set Scope to Sync only assigned users and groups.
- Set Provisioning Status to On and Save your settings.
- Go back to your Enterprise Application and choose Users and groups in the left navigation bar.
- Add all users or groups of your organization that should have a snapAddy account provisioned.
🎉 You are all set up. The initial provisioning cycle will run automatically. If any errors occur while user provisioning you can see them in the Provisioning Logs of your Enterprise Application.