How to activate the Smart Autocomplete feature in SAP Sales Cloud
This tutorial shows you how to integrate Smart Autocomplete into the New Lead form in SAP Sales Cloud
IMPORTANT: Please make sure that you have integrated snapADDY DataQuality in SAP Sales Cloud, before you start with the following tutorial.
Preparation in SAP Sales Cloud
- Reorder "Create Lead" fields.
-
We recommend you to update the Create Lead view and reorder the fields as shown bellow. This will ensure that all relevant fields are visible at once.
-
Start Adaptation.
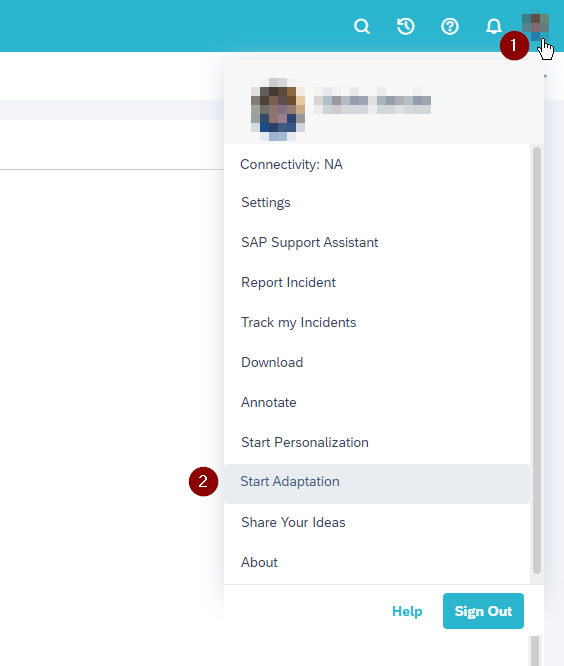
-
Reorder fields as shown below.
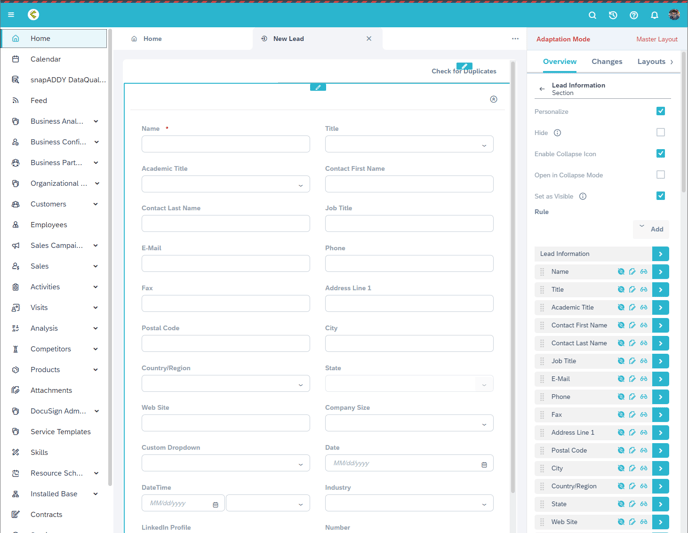
Enable Smart Autocomplete
- Smart Autocomplete is enabled within SAP by creating a new field with a specific name in the Lead entity. The snapADDY extension will ask SAP if such a field exists and if it does, Smart Autocomplete will be shown when the Create Lead form is opened.
- Start the Adaption mode and select Add → Field.
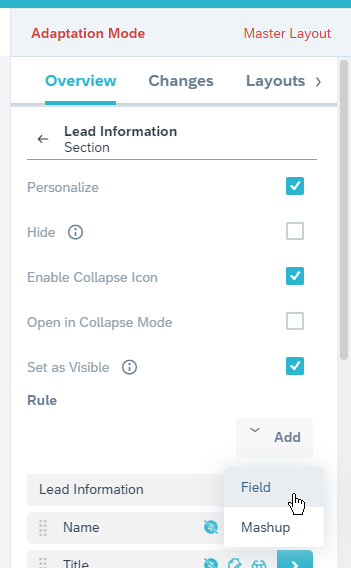
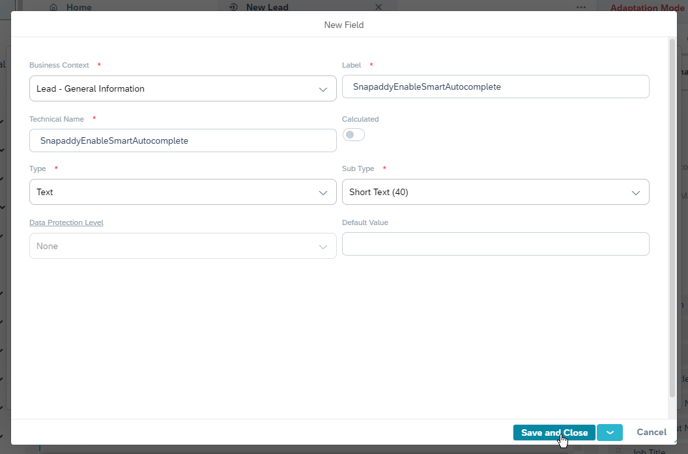
- Create a new field in the Lead entity
- Technical Name: SnapaddyEnableSmartAutocomplete
- The information as type, label etc. are not relevant. This field will not be visible in any UI in your system.
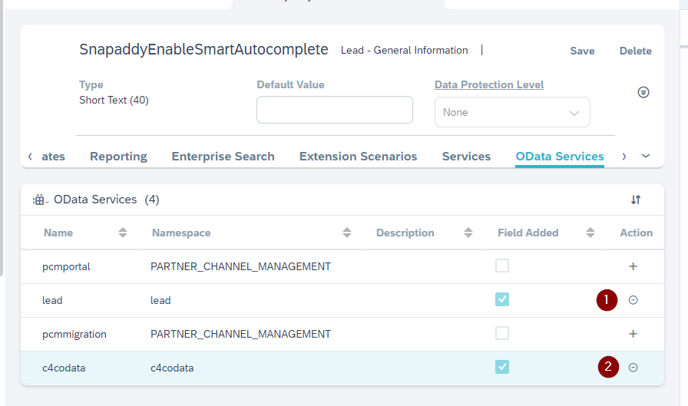
- Edit the field
- Enable the field for the "lead" OData Service, this way snapADDY will be able to detect it.
- Save your changes
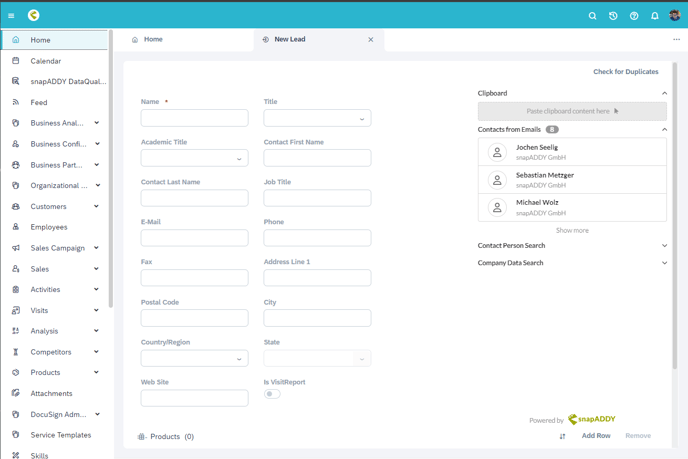
- Open the Create Lead view. Now you can use the Smart Autocomplete feature!
If you have more questions, feel free to contact our support under support@snapaddy.com or your Customer Success Manager.
