How to integrate snapADDY DataQuality in Microsoft Dynamics 365 (v. 9.1 or older)
In order to embed DataQuality in your CRM, we need to add a web resource to your CRM. The following guide will help you to create a web resource on your own.
Note: Since our internal Microsoft Dynamics 365 is only available in German, the screenshots can't be provided in English after a certain point. For a better orientation, I added the German name which you see in the picture after the English word, for example new (picture: neu).
Create web resources
- Download the following zip file and unzip it somewhere on your PC.
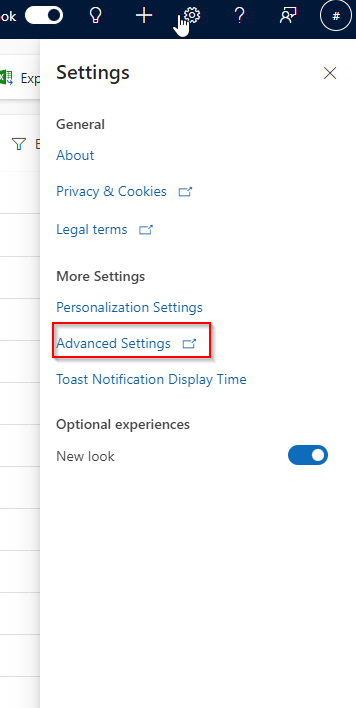
👉 DataQuality.zip - Open Advanced settings.
-
Click on Settings and select customizations.


-
Click on Customize system (System anpassen).

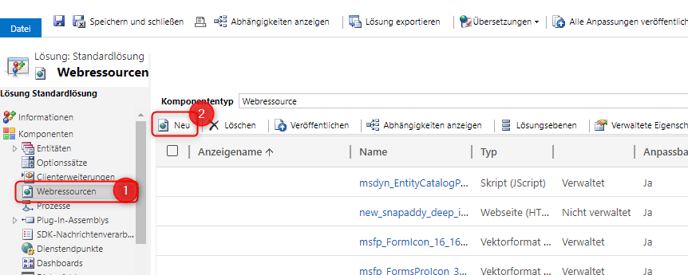
- Select the Web resources entry (picture: Webressourcen) in the list on the left and click on New (picture: Neu).
-
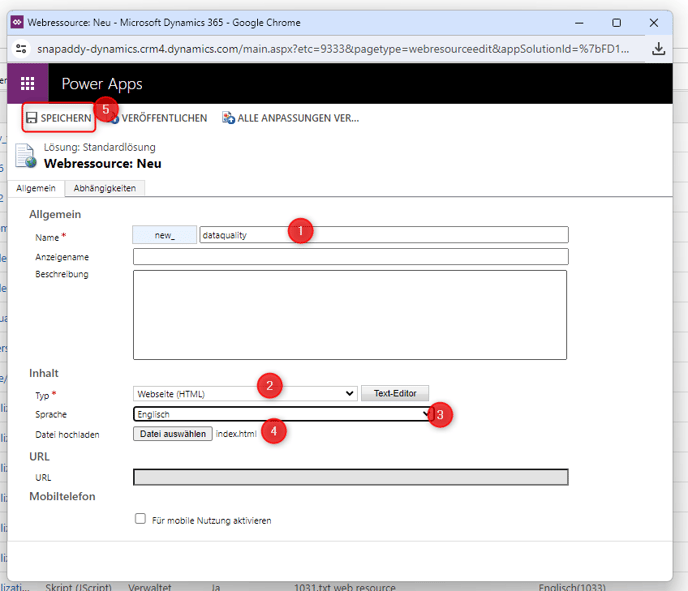
In the next pop-up, enter any name, a name and a description.
-
Select "Website (HTML)" as the type (picture: Typ), set the language to English and upload the index.html file from the archive you downloaded earlier.
- Save (picture: Speichern) your changes.
- Publish (picture: Veröffentlichen) your changes.
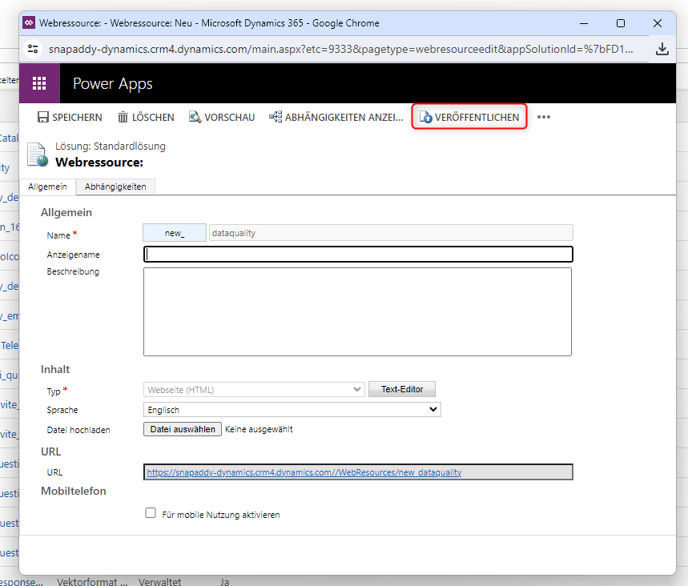
- You should now be able to find the new web resource in the list of resources.
Adding the new web resource as a tab to the Dynamics sidebar
-
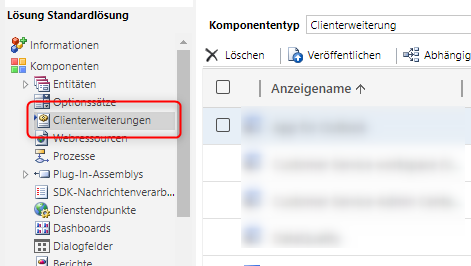
Now select the Client extensions option (picture: Clienterweiterungen) in the list on the left and find the extension you want to edit (e.g. "Sales Hub"), select it and click Edit (picture: Bearbeiten).

-
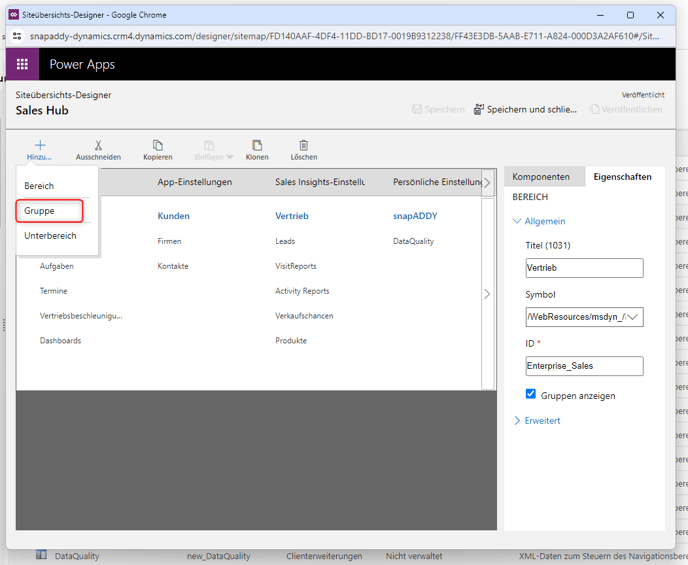
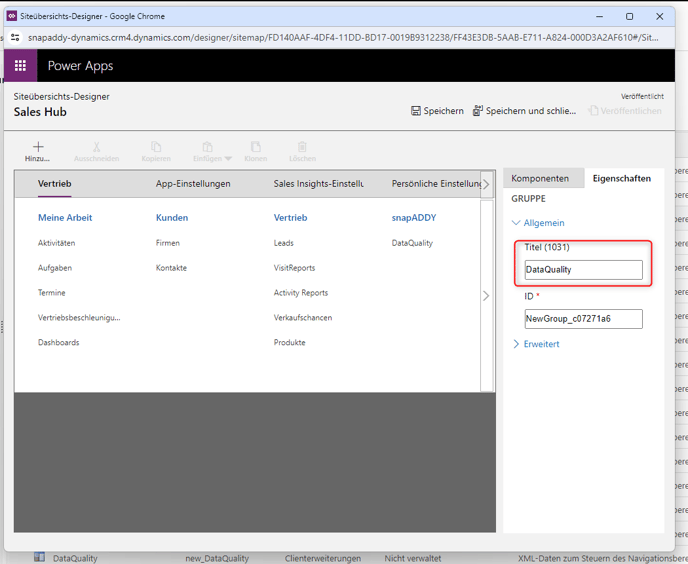
Add a new group and assign a title.
-
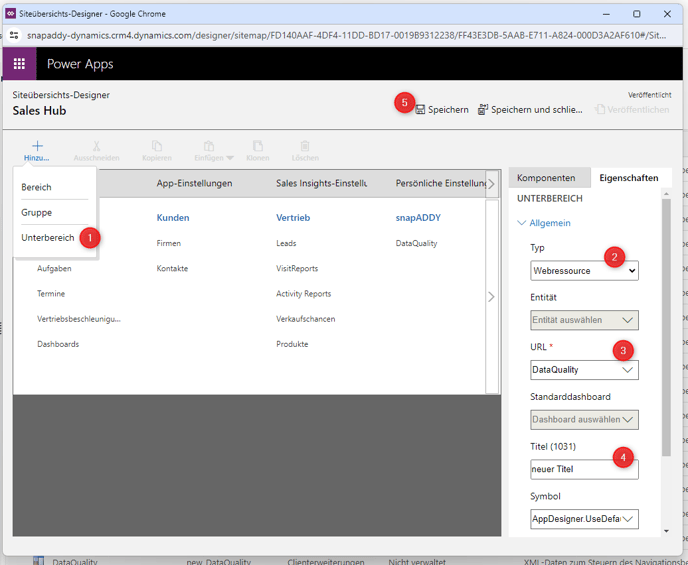
Add a new sub-area (picture: Unterbereich)
-
Select Web resource (picture: Webressource) as the type (picture: Typ)
-
Select DataQuality or snapaddy_DataQuality as the URL (activate automatic completion).
-
Add a title.
-
Save (picture: Speichern) your changes.
-
Publish (picture: Veröffentlichen) your changes.

End result
You should now see the DataQuality group/tab in the Microsoft Dynamics sidebar.

If you have any further questions, please feel free to contact support@snapaddy.com or your Customer Success Manager.

