
Connecting web forms
Web2Lead is the snapAddy's new lead-generation-tool.
It automatically adds the visitors of a contact form (e.g. on the homepage of your company) to a contact list in snapAddy LeadResearch. Once the contact information is exported to LeadResearch, these leads can be enriched with contact information and company data (and finally exported to your CRM system).
Procedure
1. Create a data-export destination
First you need an endpoint to which you can transmit the information entered in your company's contact form.
As snapAddy admin, first open your profile in your dashboard and then go to "Organisation" → "Contact Forms".
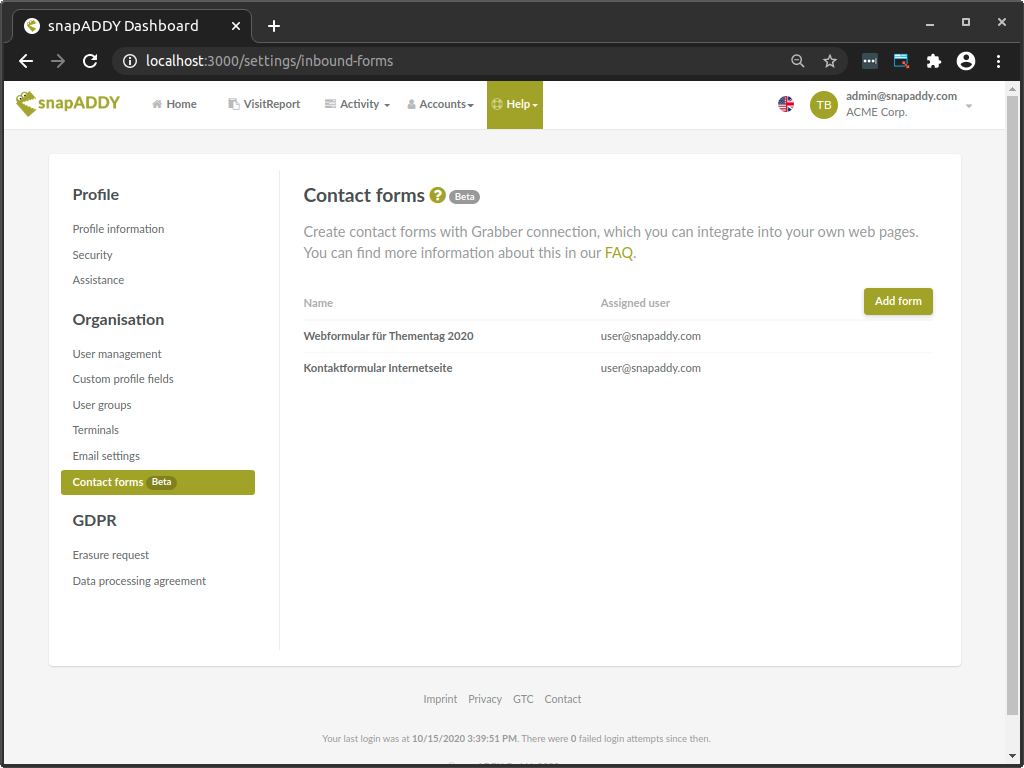
Under "Add form" you can then open an interface to create the necessary data acceptance endpoint.
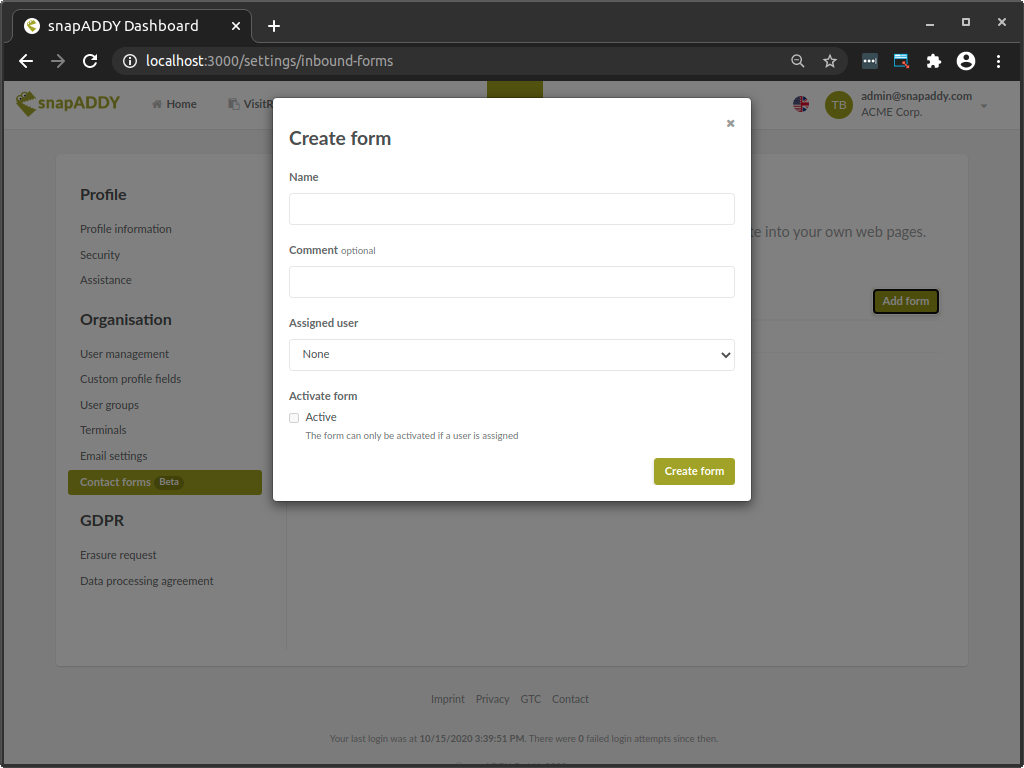
Setting the end point:
-
assign a meaningful name to the endpoint to be able to understand its purpose later
-
additional information can be optionally entered in the comment field
-
Assign a shared contact list, in whose the contact information should be stored
-
make sure that the corresponding endpoint is activated - only active endpoints write contact data into LeadResearch of the assigned user list! Inactive forms do not accept any data, and answer corresponding transmission attempts
-
create the contact form by clicking the "Create form" button
This will update your view and two additional form fields will appear.
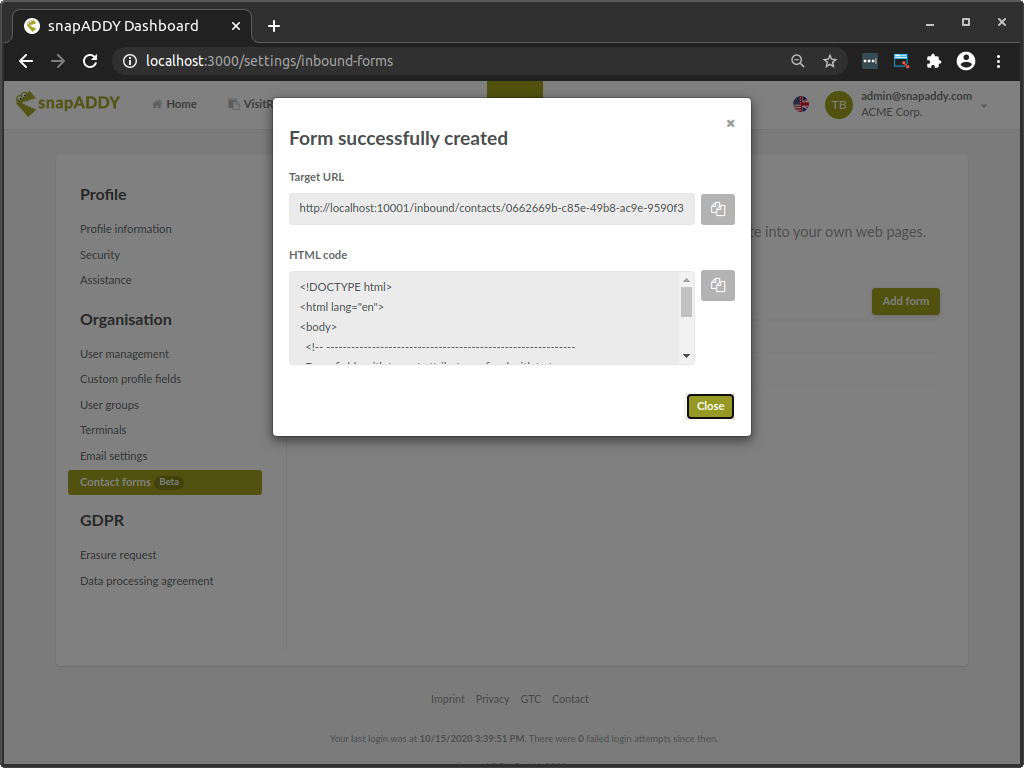
2. Copy the address of the data-export destination
In the updated view, the "Target URL" field contains the Internet address of the endpoint to which your form must submit its own data via POST request. Please copy this address to include it in the HTML source code of your form.
3. Optional: copy and adapt form template
If you do not have HTML code for a form yet, you can copy a template from the "HTML Code" field:
-
Click on the "Copy" button at the end of the line
-
Open a text editor
-
Paste the copied template
-
Save the file as e.g. "contact-form-template.html"
-
Open the saved file in your browser
In the page that appears, you will see the raw version of an HTML form with standard fields. You can change the visible input fields directly and send them to the selected end point by clicking the "Send" button. The result of the data transmission will then open in a new window. Here you can see in a JSON representation either the details of the created contact, or an error message, for example because the endpoint is not set to "active", or for example no receiving user list has been assigned.
In the HTML source code of "contact-form-template.html" you will find a code block that is commented-out. This is an exemplary collection of additional data. If you want to request and save additional information besides the standard fields, follow the instructions described in the comment block and the following section.
4. Optional: connect your own data types (customFields)
If you want to get more than the standard information, you can customize your webform further. In our mapping documentation you can see the structure of the different types of fields (e.g. text, select, multiselect...)
Additional fields, so-called "customFields" must be included in the mapping of your organization.
If your snapAddy organization runs on the standard-mapping, i.e. snapAddy was not commissioned to create an individual mapping for your organization, you can just work with the standard fields of the web form (see 3.).
With a custom mapping for your organization, you can find mapped customFields in your organization's mapping settings. Of course, you can always ask your snapAddy contact person.
When it comes to working with customFields, a few basics are crucial to understand:
4.a Form elements and customFields
To properly address your fields, always use the id of a customField as name attribute of the respective form element. This is how they are defined in your mapping:
{ "customFields": [
   {
      "id": "c_description",
      "label": {
         "DE": "Beschreibung",
         "GB": "Description",
      },
      "properties": {
         "defaultValue": ""
      },
      "type": "INPUT"
   }
 ]
}
In your HTML form you must then translate the customFields as follows:
<input name="c_description" type="text" id="Description">
The name attribute is the determining factor, when it comes to the values being exported correctly, while the id attribute can be used arbitrarily.
Communication details
Export formats
Receiving data on the server side can be done via two formats:
-
as application/x-www-form-urlencoded, which is the standard behavior of HTML forms without further enctype-specification, which data are stored:
firstName=Max&lastName=Mustermann&email=m.mustermann%40snapaddy.com&organization=snapADDY+GmbH&companySize=1-10
-
in a JSON format in the request body:
{
   "firstName": "Max",
   "lastName": "Mustermann",
   "email": "m.mustermann@snapaddy.com",
   "organization": "snapAddy+GmbH",
   "companySize":
   "1-10"
}
Details of possible server responses with regard to contact information, submitted by webforms can be found in the reference to the Swagger API, where you can also experiment with the relevant requests directly.
Validation checks
In order to spare you from incorrect contact information in LeadResearch, we check:
-
that non-empty, e-mail addresses are theoretically valid
-
that transmitted dates are valid, e.g. that they are not dated February 35, 2020
-
that values for customFields are also valid according to your specifications, (e.g. that no picklist choice is transmitted which is not actually part of your picklist values)
Date format
To get correct date entries, you must first decide whether you want to
-
transmit a simple date: this can be done in the form of common <input type='date' ...> or <input type='datetime-local' ...> elements, but it only works for use within the time zones UTC-11 to UTC+11. These transmission forms do not accept transmitted times. The latter are always taken as "at 12:00 noon, in time zone UTC+0".
-
or if you need a complete, time zone based date and time, for which your form has to submit an ISO 8601 timestamp in UTC with offset 0
|
Valid Date Format |
Example |
Generates... |
Valid range |
Created with |
|
yyy-MM-dd |
2020-12-31 |
date only |
UTC-11..UTC+11 |
<input type='date'> |
|
yyy-MM-dd'T'hh:mm |
2020-12-31T23:59 |
date only |
UTC-11..UTC+11 |
<input type='datetime-local'> |
|
yyy-MM-dd'T'hh:mm:ss |
2020-12-31T23:59:59 |
date only |
UTC-11..UTC+11 |
<input type='datetime-local'> |
|
yyyy-MM-dd'T'HH:mm:ss.SSS'Z |
2020-12-31T23:59:59.999Z |
date and time |
global |
Date.prototype.toISOString() |
Do I need one endpoint per contact form?
No, you can use an already existing endpoint for as many forms as you like.
What happens to contacts that are sent to inactive endpoints?
The endpoint refuses to accept the contact data and terminates the network request with error 404, "Not found". No contact data is written to LeadResearch.
I have deleted my Endpoint accidentally - what now?
If you have deleted an endpoint by mistake, please contact snapAddy support. We will be able to restore the endpoint for you.
Further references
-
list of all possible standard fields for forms: here you can see for which kind of information values can be submitted - you can use the listed names directly as name attribute for form elements in your contact form
-
Documentation of the network details, as well as Swagger API to try out the network requests in JSON format: here you don't need a form, but can simply provide the desired information as JSON data, JSON template included.
-
Instructions for creating your own data types: if our standard modules are not sufficient for you, for example, because you want to inquire about product interests etc., you will find instructions here to allow further response options and additional information in your contact form, which will be saved directly with LeadResearch contacts.