Suggestions: Contact lists
In this article you will learn how to create lists and what they are useful for
When you click on contact suggestions, you may be able to choose between different lists. With the help of lists, contacts can already be presorted. This enables employees to work more efficiently.
By default you have one main list, but there is also an option to create different lists.
This works as follows:
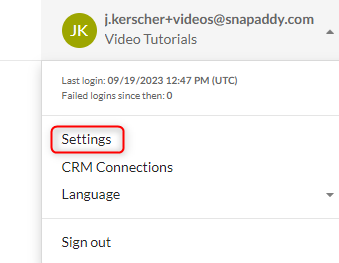
- Click on Settings
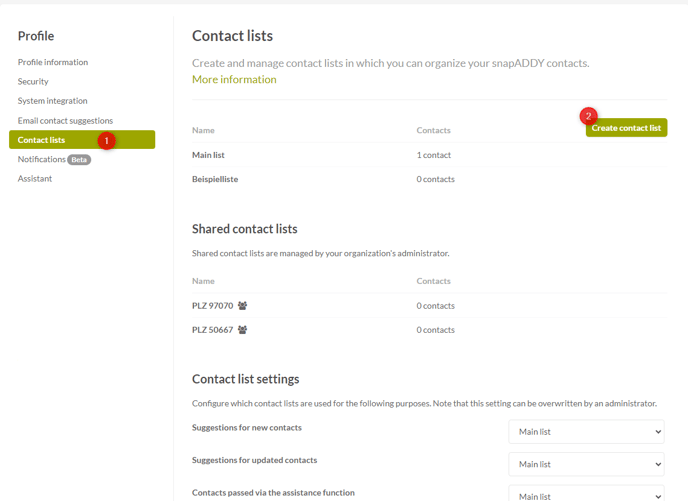
- Click on "Contact lists" in the "Profile" section
- You can create a contact list by clicking on "Create contact list"
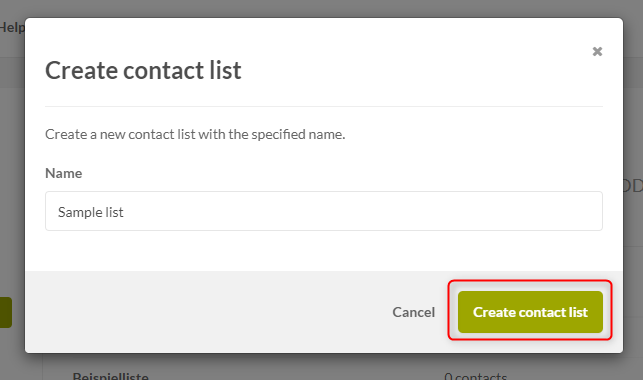
- Name the list and click on "Create contact list"
- In the "Contact list Settings" section, you can specify the purposes for which you want to use the lists. Please note that the settings can be overwritten by an admin.
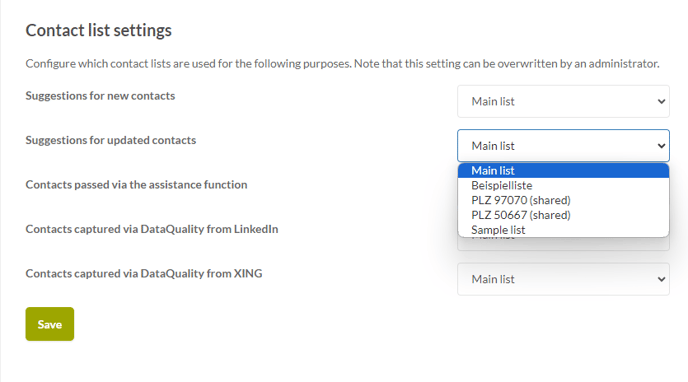
Shared contact lists can only be created by the administrator. If a list has been shared with you, you can select it in DataQuality.
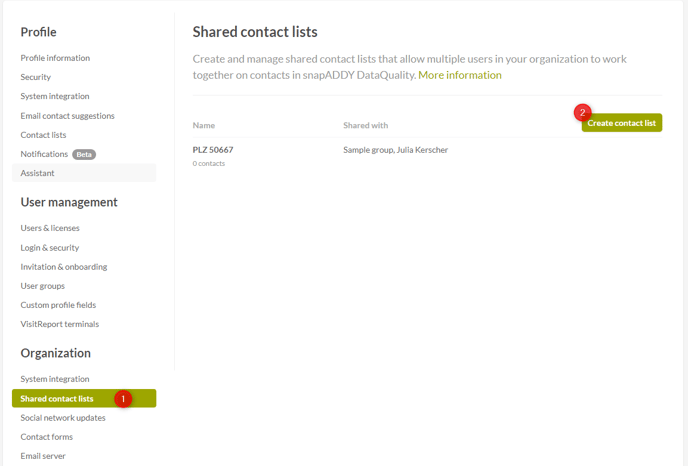
- Click on "Shared contact lists" in the "Organization" section.
- Click on "Create contact list".
- Name the list and select which user or user group you want to share it with.
- Click on "Create contact list"
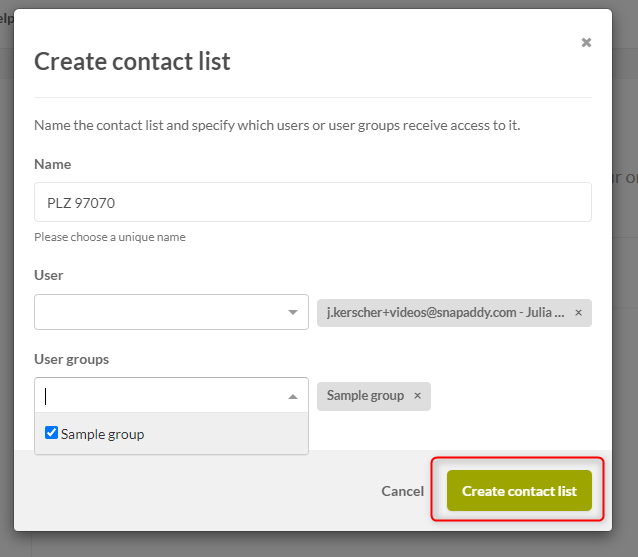
- The list will now appear to the users with whom the list was shared.

If you have any further questions, please feel free to contact support@snapaddy.com or your Customer Success Manager.
