
If your organization uses the Security Assertion Markup Language (SAML) standard for login authentication, you can configure snapAddy for login via a supported Single Sign-On (SSO) provider (e.g. Azure AD, G Suite, ADFS, OneLogin, Okta, etc.).
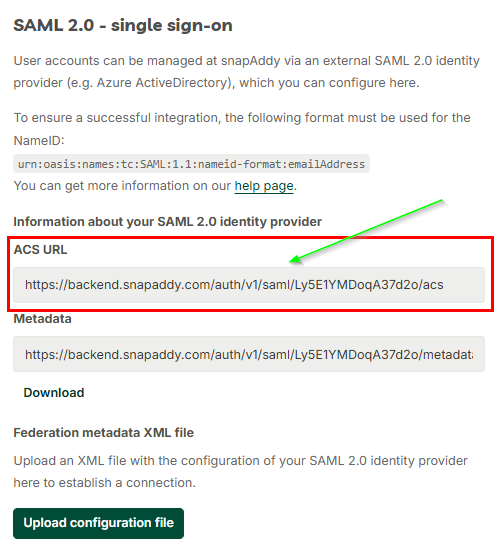
User accounts can be managed at snapAddy via an external SAML 2.0 Identity Provider, which can be configured in the snapAddy Dashboard (app.snapaddy.com). snapAddy uses the email address as a unique identifier for its users. To ensure a successful integration of the SAML 2.0 workflow, the following format must be used for the NameID:
urn:oasis:names:tc:SAML:1.1:nameid-format:emailAddress
Step 1:
- Go to the snapAddy Dashboard
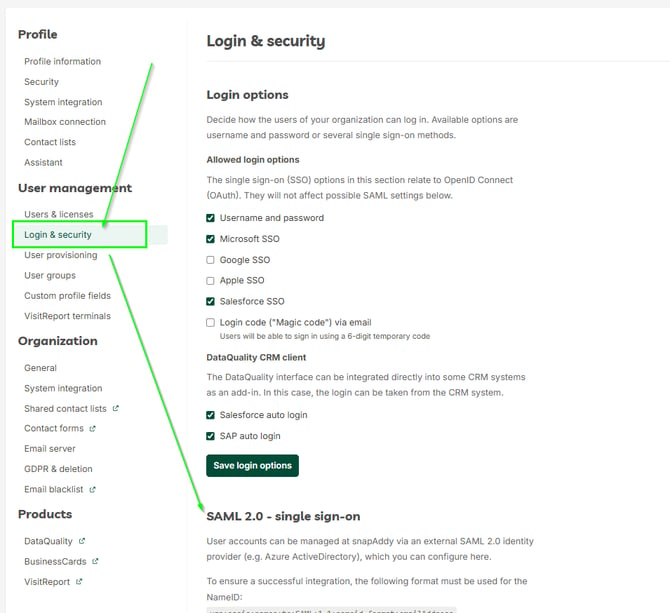
- Go to Settings →User management→Login & Security
- Navigate to “SAML 2.0 - Single Sign-On”.
- Copy the ACS URL
Step 2:
- Then go to the Okta window
- Open the menu and click on “Applications”
- Then click on “Create App Integration”

Step 3:
Select the SAML 2.0 option and click on “Next”

Step 4:
The App logo and App visibility items are not mandatory fields and do not need to be filled in. Then click on “Next” again

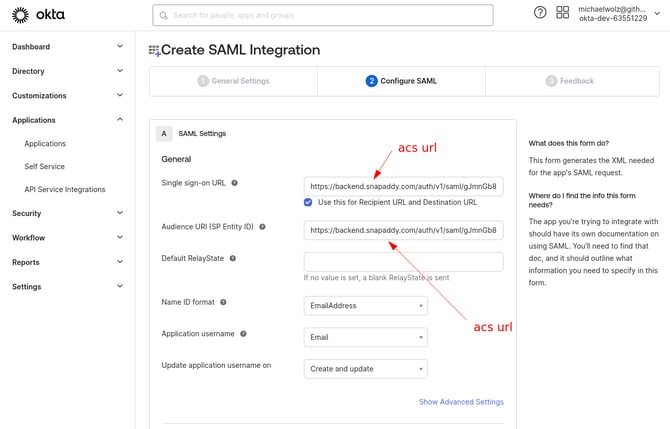
Step 5:
Next, you will need to insert the snapAddy ACS URL into the Single sign on URL and Audience URL fields.
Step 6:
After you have completed the general settings, the Sign On settings now follow.
- Copy the metadata URL and open it in a new tab
- Save the content of the new tab as an XML file using the key combination ctrl + s

Step 7:
- Go to the snapAddy dashboard
- Go to Settings → Users management→ Login & Security
- Navigate to “SAML 2.0 - Single Sign-On”.
- Upload the XML file

Step 8:
Make sure that the Metadata XML file has been added.
Step 9:
Log out of the snapAddy dashboard and log back in so that the single sign- on settings are applied.

Step 10:
Log in to your Okta account again so that the single sign-on settings are applied. This completes the setup for single sign-on okta. Please test whether the integration works as desired.

Please note that the snapAddy SAML connection was created according to specification, based on the integration documentation of okta. Therefore, the application must be implemented on the okta side using PATCH.