
The OAuth 2.0 client allows end users to easily access a service provider using the same credentials wich are already in use for other services. Communication between the OAuth 2.0 client and the server is protected by an HTTPS connection.
The snapAddy certificate is a prerequisite for setting up the OAuth connection to SAP. You can obtain this certificate in the form of a ".cer" file here. All settings must be configured by the administrator of the organization.
- Download the certificate here in the form of a ".cer".
- With the downloaded certificate, snapAddy can now be registered as a so-called OAuth 2.0 Identity Provider in your CRM system.
- Log in to your SAP Sales Cloud and click on "Common tasks" in the "Administrator" section.
- Select "Configure OAuth.2.0 identity provider".


-
Click on "New OAuth 2.0 provider".

- Assign a name for the issued entity.
- Upload the.cer certificate that you downloaded previously
- Activate the "Email-address" button.
- Click on "Submit".

- To register the client, click on "OAuth 2.0 client registration" and then on "New".

- Enter a description.
- Select "snapaddy.com" as the issuer name.
- Assign a Client secret.
- Select UIWC:CC_HOME as the scope ID.
- Click on "Save and close".

-
To set up the client registration, click on "Common tasks" again and then on "Configure single sign-on".

- Copy the Local Service Provider.

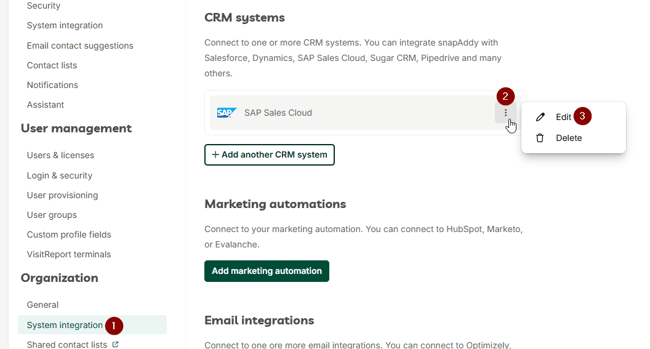
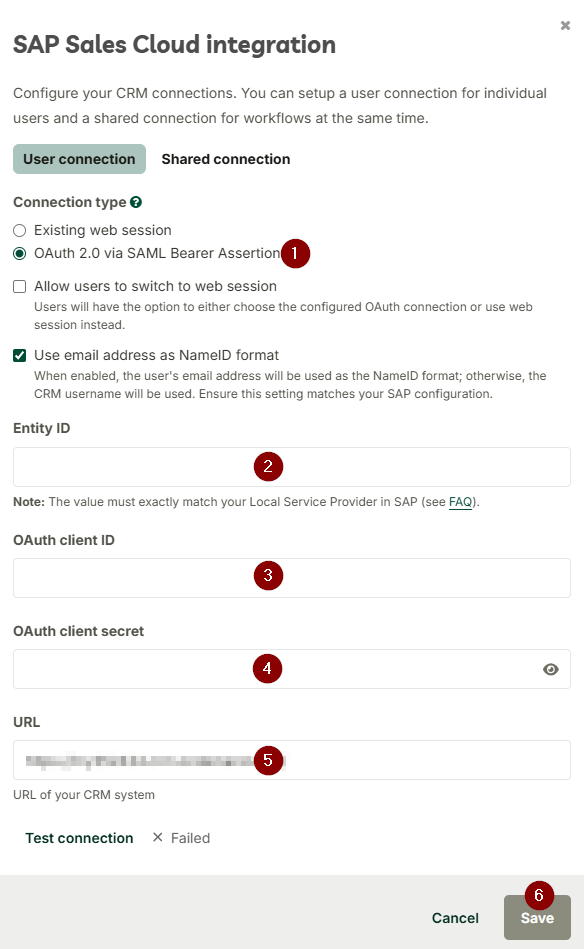
Store SAP OAuth client credentials in the snapAddy organizational settings
- Select "OAuth 2.0 via SAML Bearer Assertion.
- The entity ID is the local service provider that you copied in a previous step.
- The OAuth client ID is the client ID from a previous step.
- The OAuth client secret is the client secret from a previous step.
- Insert the URL of your CRM system
- Click on "Save".
After successful setup, the snapAddy clients can now request and use access tokens for the CRM-system's organization members, to perform a snapAddy CRM export or synchronize data. No further set-up on the user's side is required.
If you have any further questions, please feel free to contact support@snapaddy.com or your Customer Success Manager.