
Step-by-step instructions for installing the Connected app
Important: You need Salesforce administrator rights to perform this installation.
If you don't have administrator access, please contact your Salesforce administrator to complete this one-time setup.
Step 1: Initiate Connection
- Navigate to the System Integration settings in the snapAddy Dashboard in your browser
- Select Salesforce from the list of available CRM systems
- Click on "Save and Connect"
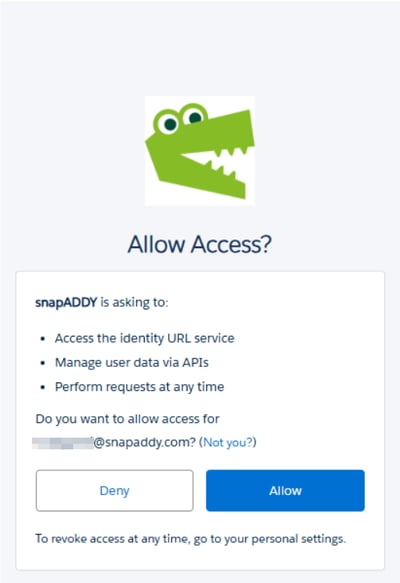
- You will be prompted to log in to Salesforce
- If you are already logged into Salesforce, an authorization screen will appear
- Click "Allow" to grant snapAddy the required permissions
Step 2: Install Connected App in Salesforce
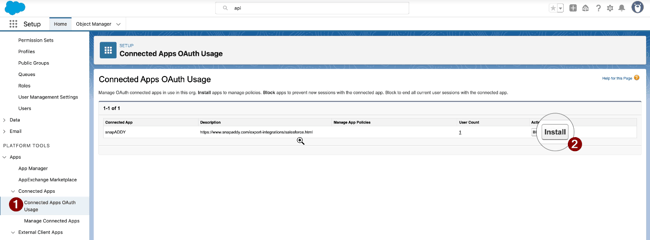
After the initial authorization, a Salesforce administrator must complete the installation:
- Log in to Salesforce as an administrator
- Navigate to "Connected Apps OAuth Usage" in Salesforce Setup
- Find the "snapAddy" Connected App in the list
- Click on "Install"
Once installation is complete, all users in your organization can connect snapAddy to Salesforce without any additional configuration.